Wondering how to compost chicken manure? Look no further!
Whether you are raising your backyard flock in a rural, suburban or urban setting, a big part of raising chickens is learning how to deal with the accumulated chicken manure. Even a small flock can produce a substantial amount of waste in your coops, runs, and yard, making it difficult to simply throw it out with the trash. The best solution to dealing with your flocks manure is to turn it into fertilizer by using one of two composting methods, and it is a lot easier than you may think!
Misconceptions:
One of the most common misconceptions about using chicken manure for fertilizer is that you can skip the composting process. Because chicken manure is very high in both pathogens and nitrogen, applying raw manure to your garden can increase your risk of contracting salmonella and could result in plant death due to excessive amounts of salt and nitrogen being absorbed. For these reasons, it is highly recommended that you engage in a composting method before using chicken manure as a fertilizer.
Benefits:
Three benefits of composting are:
- Making good use out of your chicken’s waste
- Increasing the water holding capacity of your soil
- Providing an excellent source of fertilizer for your plants and garden
In fact, chicken manure can provide your garden with more nitrogen, phosphorus and potassium than horse or cow manure can.
Materials:
There are two main methods of composting, but both require similar ingredients and materials.
The first category of materials are “brown” materials, consisting of carbon-rich ingredients that act as food sources for soil-dwelling organisms and aid in filtering air through the pile.
Brown Materials:
- Coop bedding
- Wood shavings
- Dry leaves
- Straw
- Hay
- Paper/Cardboard
Second, we have nitrogen-rich “green” materials.
Brown Materials:
- Chicken manure
- Vegetable and fruit scraps
- Grass, leaf, and plant clippings
- Coffee grounds
- Egg shells
Two Methods of Composting:
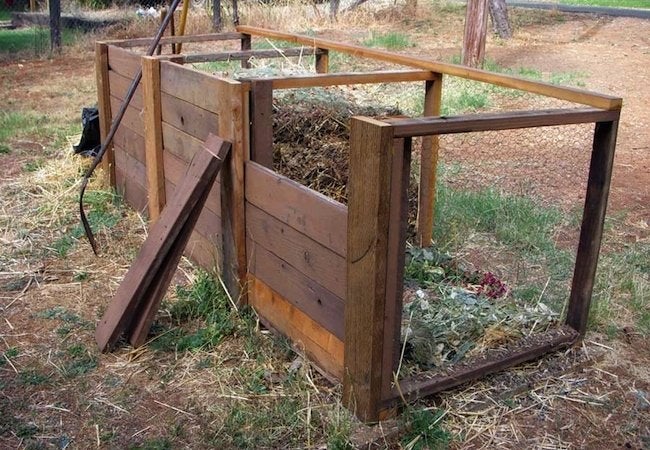
1. Cold/Passive Composting
Cold, or passive, composting requires a minimal amount of effort; however, it can take as long as 6 months to over a year depending on the climate where you live.
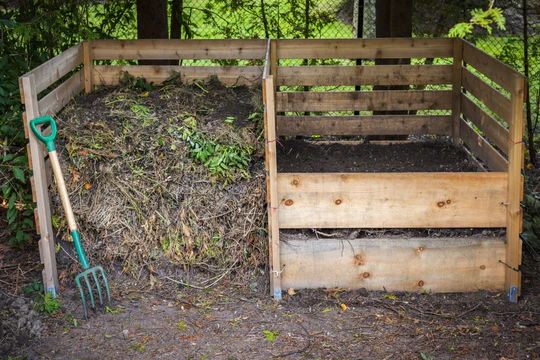
To begin cold composting, you need a purchased or constructed compost bin. It is common to construct one using wood panels or crates.
Next, using a Carbon to Nitrogen 2:1 ratio, you can begin adding your brown and green material in layers. Starting from the bottom, you will need to pile the ingredients in layers in the following order:
- Carbon materials
- Soil
- Nitrogen-based manure and materials
- Soil
These steps should be repeated until the pile is around 3 feet high.
Next, you need to add water to the pile so that the texture and consistency is the same as a damp sponge.
And that is it! You are essentially letting the pile build and decompose naturally until the mixture is dark and crumbly with the consistency of soil. If possible, it is recommended that you periodically add more water and give the pile an occasional turn with a pitchfork, but otherwise your work is complete until it is ready to be used in your garden.
2. Hot/Active Composting
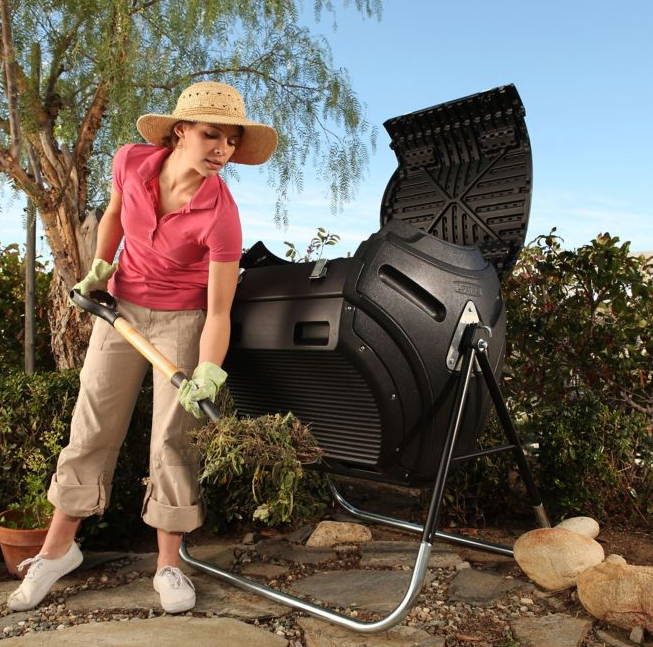
Hot composting is the quicker option for turning your chicken poop into an efficient fertilizer. However, it is a little more hands on and requires a different type of composting bin, known as a tumblr. You may also need to use a thermometer in order to monitor the heat of your pile.
This method is called “hot” composting because it can reach an internal temperature of 150°F by providing an environment where the green material can actively attract the microorganisms that heat things up in order to destroy weed seeds, bacteria, and disease-causing organisms.
The method of adding the compost to your tumblr is the same as in cold composting, whereby you add your brown and green material in layers and add water until the pile is damp.
You will need to check the temperature of the pile with a compost thermometer or an old kitchen thermometer. A temperature of 110°F to 140°F is preferred. If you do not have enough heat, you can add nitrogen by increasing the amount of manure, soft green ingredients, or an organic fertilizer.
Turning daily with a pitchfork or by a spinning tumblr bin, the pile should reach about 150 degrees Fahrenheit within the first week before it cools and becomes a dark, rich, soil-fine compost. In total, the hot composting method should take around 18 days.
RELATED ARTICLES
Preparing Your Flock For Fall
As Fall approaches, you may be wondering what you need to do to prepare your flock for fall. Preparing Your Chicken CoopAs the weather gets cooler, is it important to ensure that your coop has no leaks in the roof or any entry point for water. Inspect your coop for...
Friendliest Chicken Breeds
With the spring season approaching, it is almost time to start thinking about raising chicks! Choosing the right breed is an important step in the journey of raising chickens. There are many breeds to choose from depending on your needs, preferences, and climate....
Chicken Molting – What Is It And What To Expect
As the Fall season begins, we can expect the days to become shorter and the temperatures to become cooler. However, you may not expect that these changes send a signal to your flock to start shedding their feathers. For backyard chickens across the country, the...

